
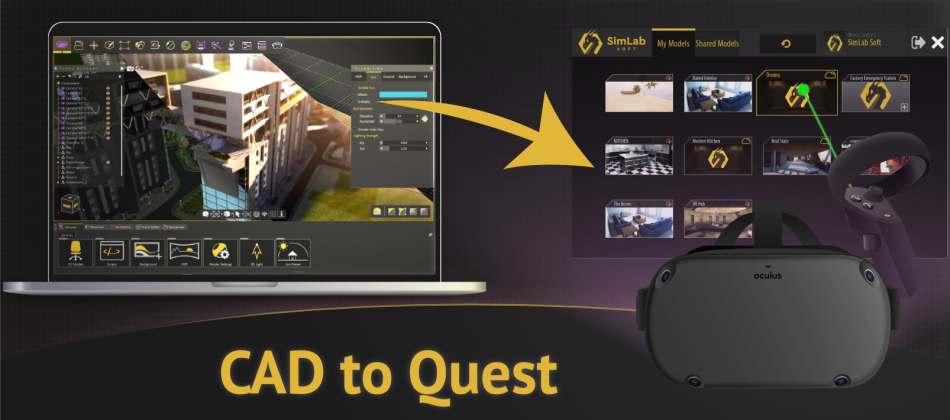
In this article, I am going to show how we can create a VR experience from any 3D model or scene, then how to add it and run it on the Oculus Quest.
How to create a VR scene that can be added to the Oculus Quest?
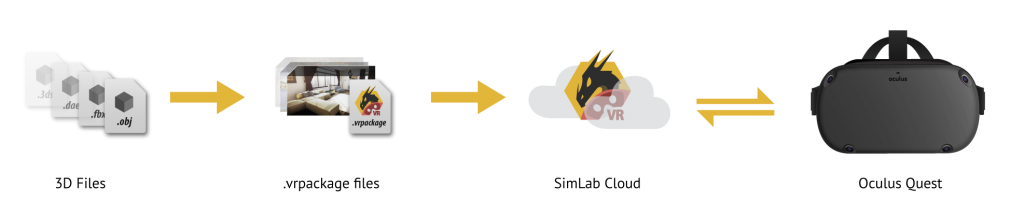
In order to add your 3D designs into the Oculus Quest as VR scenes, you need to create .vrpackage files containing those designs, then you transfer those vrpackage files into the Oculus Quest by uploading them into SimLab Cloud.

Step 1: Create a connection between the Oculus quest and your SimLab Cloud.
you need to pair your Oculus quest with your SimLab account following this blog.
Step 2: Upload the vrpackage file into SimLab Cloud, detailed steps are shown here.
If you don’t know how to create vrpackage files from your designs, you may learn how to do that in the next section below.
After you upload the vrpackage to SimLab Cloud, then you will have access to it through the Oculus quest and all of your paired devices, to know more about VR sharing, you can read this article.
Creating vrpackage files from your CAD:
1- Install SimLab Composer on your PC from here.
“you can have a fully functional trial license for 21 days.”

2- Import your 3D files into SimLab Composer (supported 3D formats).
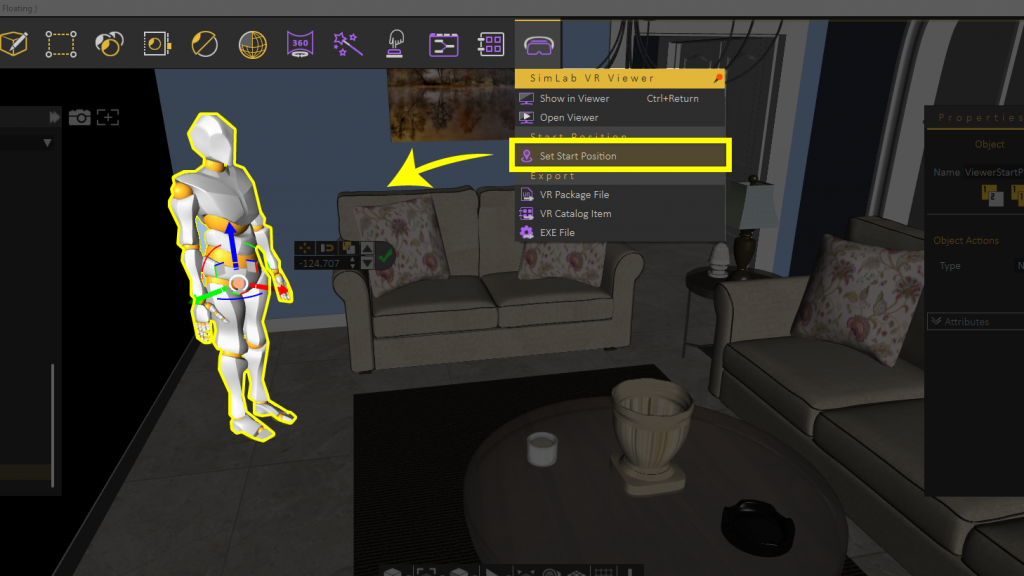
3- Set a start position for the VR scene.
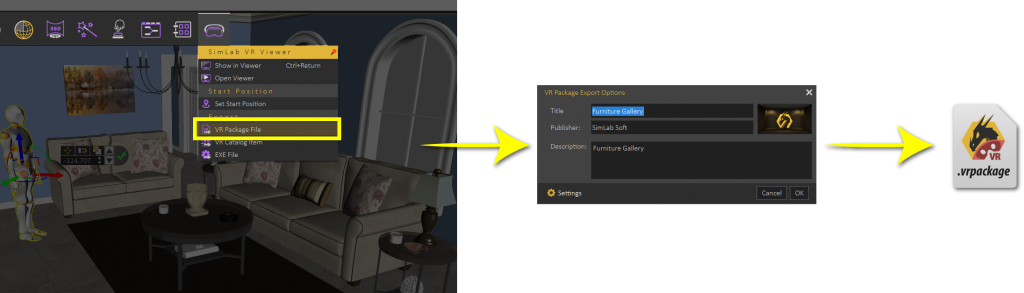
4- Export into vrpackage file.
5- Go back to step 2 to complete uploading your vrpackage.
You can edit the materials, change the environment, add animations and interactions, create visual elements, and even create full training sessions out of your 3D models using SimLab Composer.learn how to create advanced VR scenes here.