Method 1: Oculus Store
Get it directly using your Oculus account from here.
Method 2: Offline Installer ( dev mode )
Use this method if you don’t have access to an oculus account.
You can watch the full detailed video here or you may follow the steps below to install SimLab VR Viewer on your Oculus Quest.

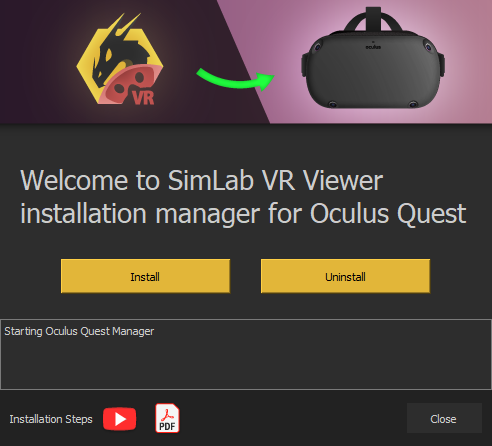
Step1: Install and run SimLab VR Viewer Installation Manager for Oculus Quest.
Download for Win:
https://simlabquest.s3.amazonaws.com/SimLab_Oculus_Quest_v1.23.1.exe
Download for Mac:
https://simlabquest.s3.amazonaws.com/SimLab_Oculus_Quest_v1.23.1.pkg
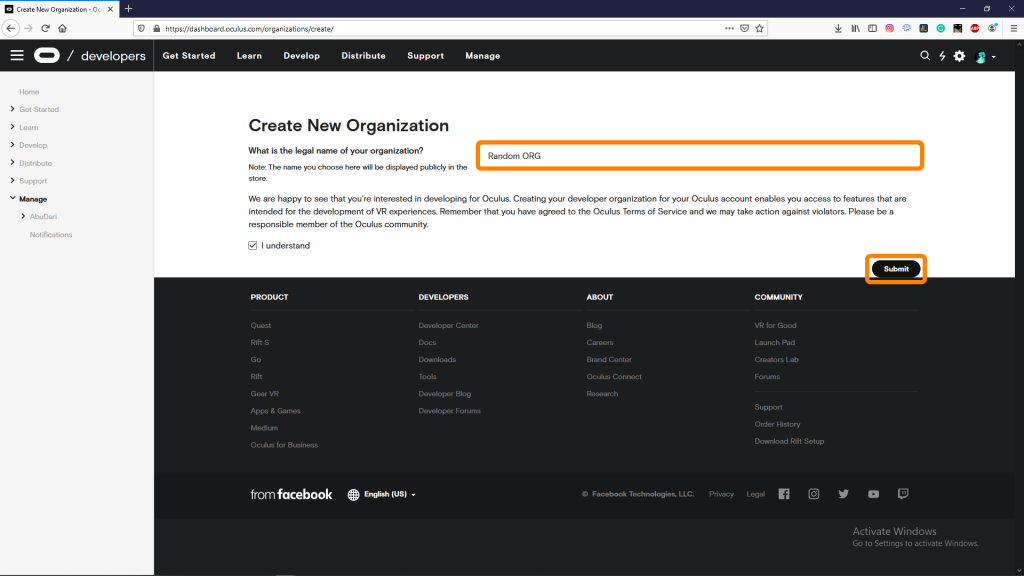
Step2: Unlock Developer features on your Oculus Account (If you already have a developer account, skip this step).
- Go to https://dashboard.oculus.com/organizations/create/ and make sure you are logged in to your Oculus account.
- Put any name you want then complete the submission.
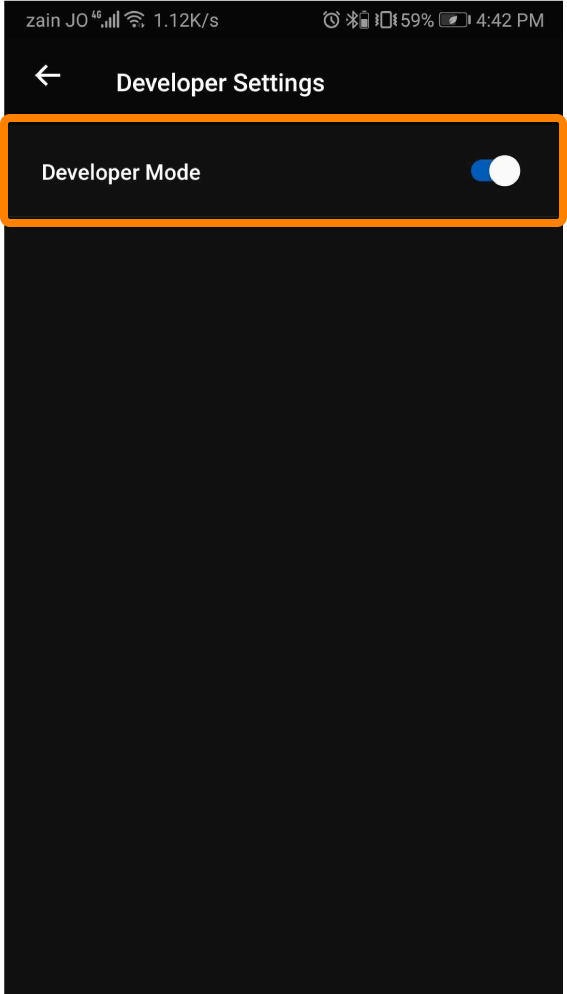
Step3: On your mobile device, run the Oculus app, select the Oculus Quest device and go to developer options, then turn on developer mode.
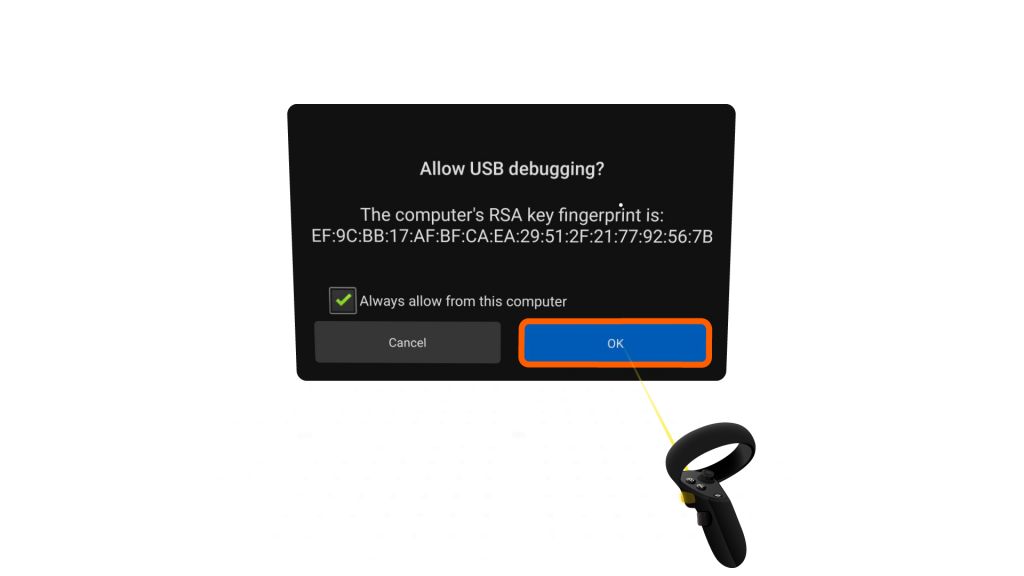
Step4: Connect your Oculus quest to your PC.

Step5: On the Oculus Quest, wait for the confirmation message and Allow the USB Debugging.
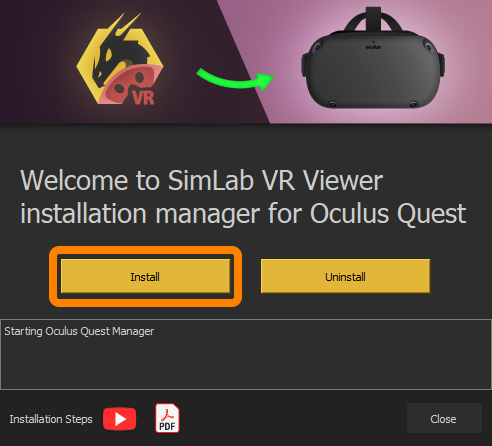
Step6: Click (Install) button on the Installation Manager and wait for the installation to complete.
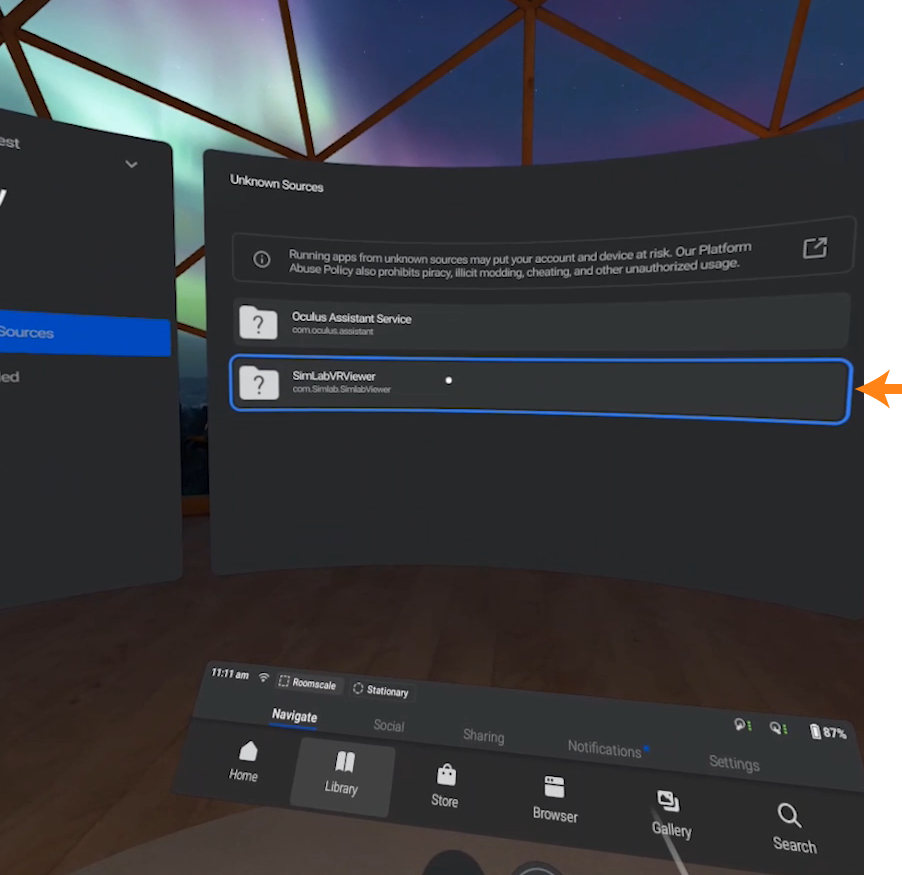
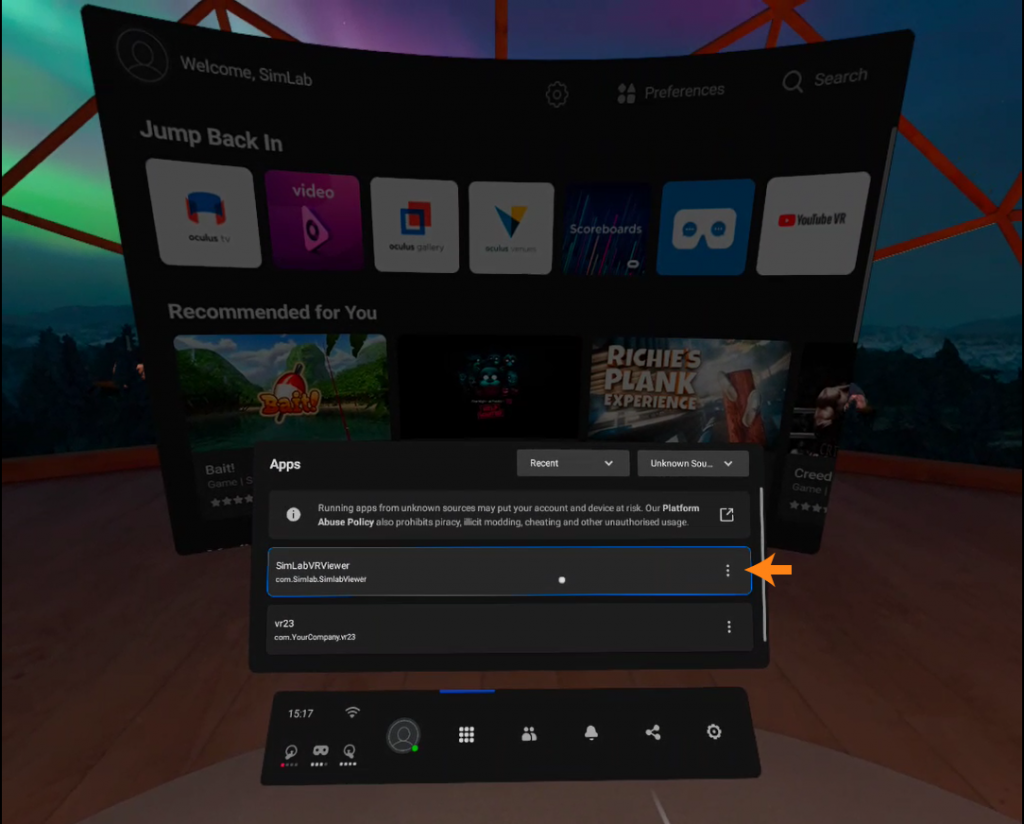
Step7: On the Oculus Quest, go to Librariy > Unknown resources > SimLab VR Viewer.