
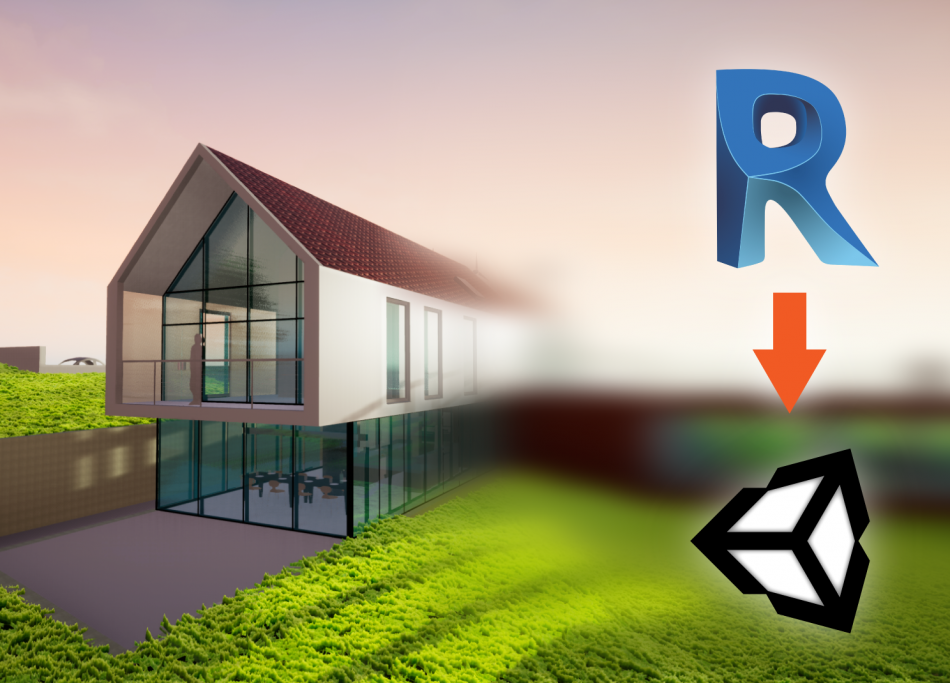
Step by step workflow for transferring 3D models from Revit to Unity with textures. We hope you will enjoy it.
FBX exporter included with Revit saves materials in an encrypted way, that Unity cannot read. The solution we provide here requires the Pro edition of SimLab Composer (costs $199) or you can use the 21 days free trial.
Start by opening the model in Revit, setting view to 3D, and then exporting the model as a DWFx file.
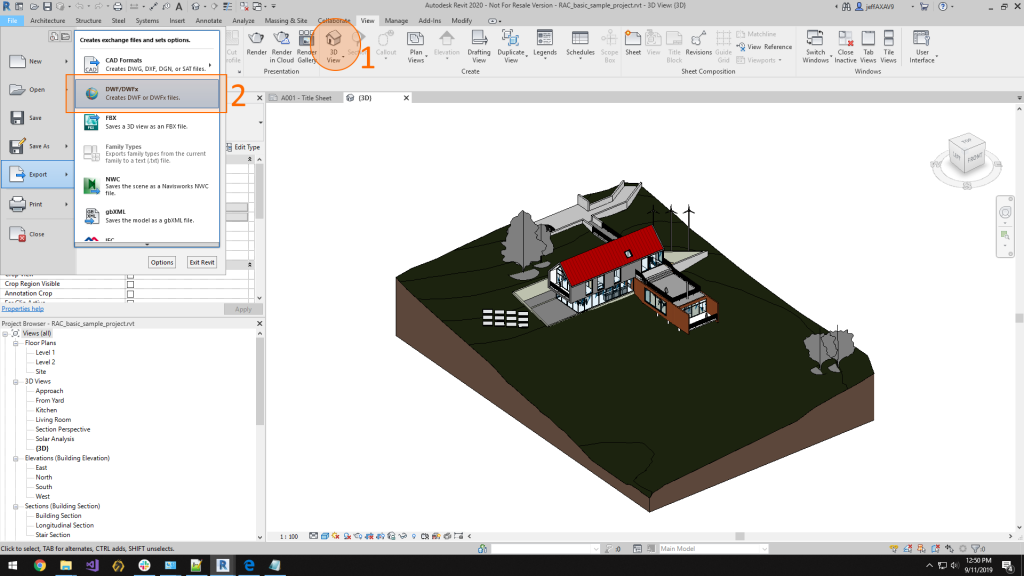
DWFx 2 Composer
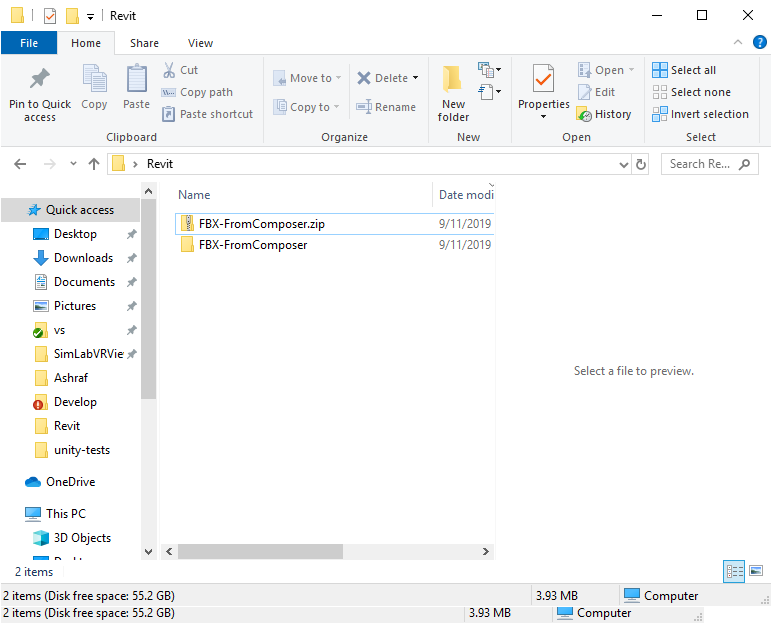
Next we import the file to SimLab Composer, from the File menu we pack the scene as an FBX file

Unzip the packed scene
Packed scene is a regular zip file that you can unzip using any unzipping tool, the result folder includes the FBX file, and all the needed textures
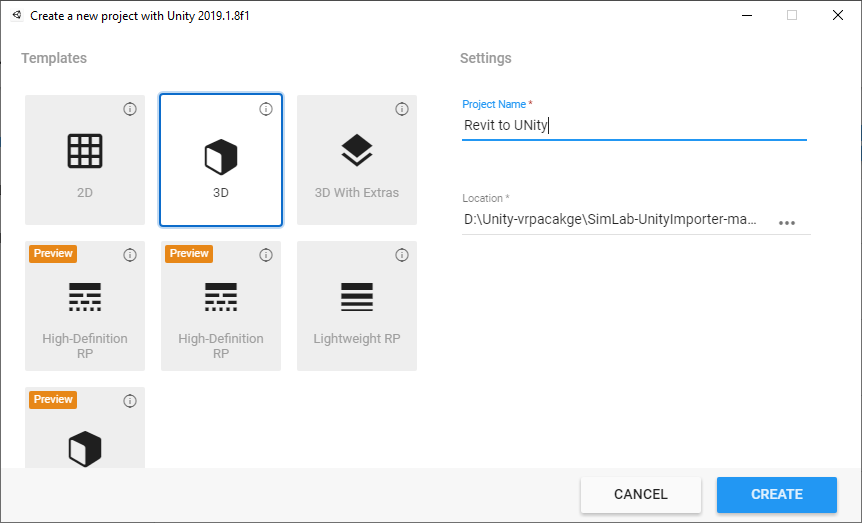
Start Unity
Now we start unity, Select 3D project type, and select a good name for the project
Add FBX to Unity
Add the file to Unity by dragging it and dropping it on Unity assets, at this point file is added without textures.
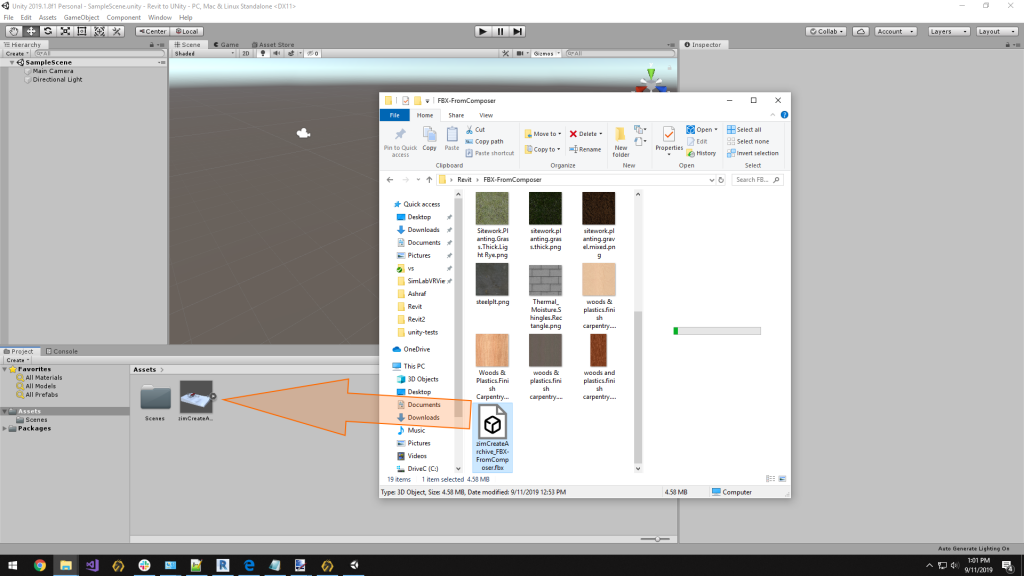
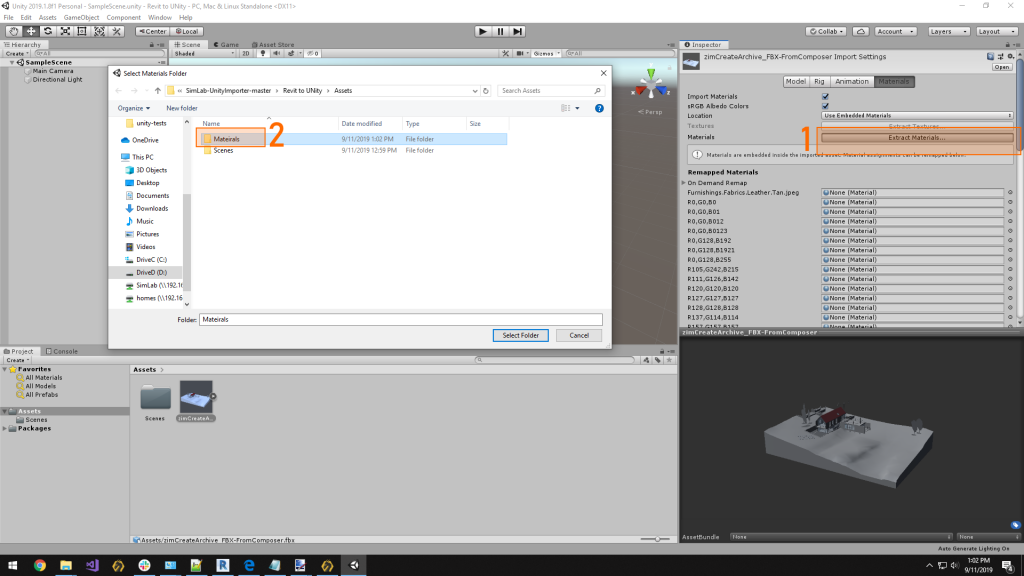
Extract materials
Clicking on the 3D model added to assets shows the following dialog. Click extract materials, create a new folder names Materials, and select it to extract materials
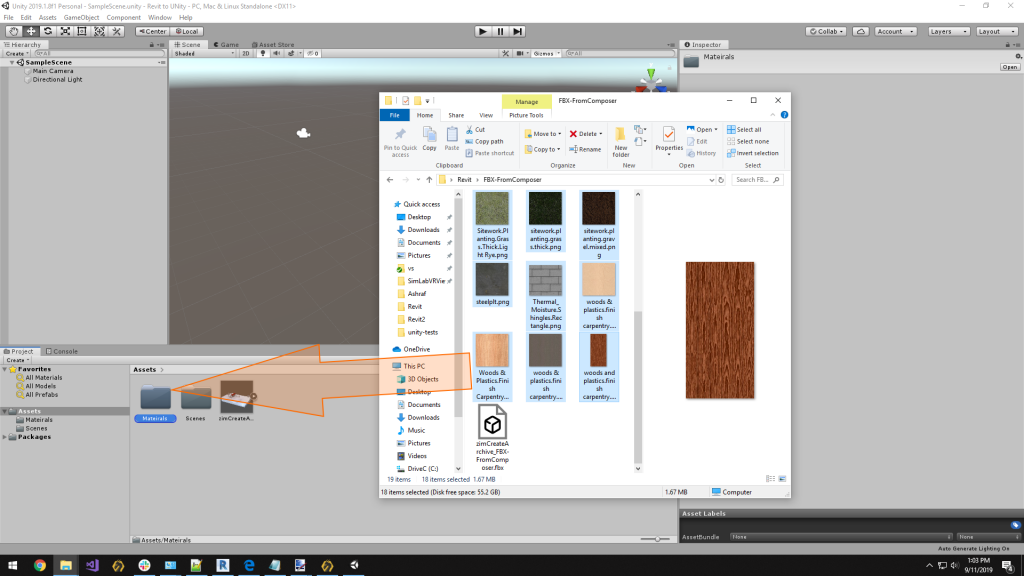
Add Textures
Now select all textures in the unzipped folder, and drop them in the Materials folder.
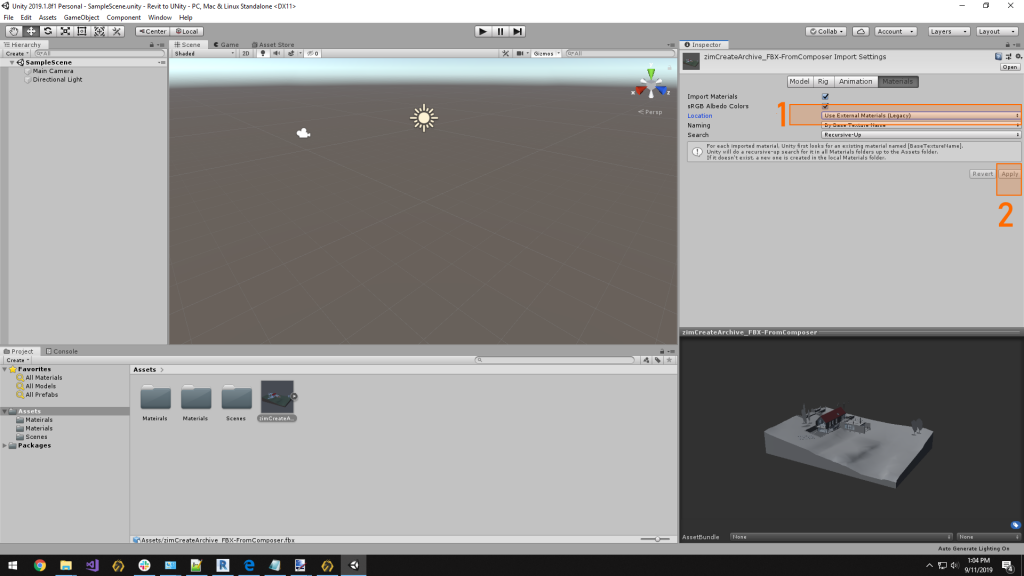
Resolve textures
Change material Location to set External Materials (Legacy), then hit apply
Models with Texture
Now you should have the model in Unity with all the needed textures. The model is now ready to be used for creating a VR experience.
This concludes steps for Revit to Unity with textures. Unity experts if you think we can cut any of those steps please provide us with suggestions.